In this tutorial, we will be using GitHub Codespaces to run the exercises. If you are not familiar with Codespaces, please refer to the Codespaces documentation for more information.
Navigate to the FTorch-workshop repo page repository and click on the green “Code” button. NOTE: Make sure you open a Codespace for FTorch-workshop, not FTorch.
Select “Codespaces” and then “Create codespace on main”.
Wait for the codespace to be created and opened in your browser. You will be put in a VSCode environment with a terminal at the bottom.
Execute the following to start the FTorch build process:1
source build_FTorch.sh
Note that after running this there will be a Python virtual environment set up and activated for you.
Motivation
Machine Learning in Science
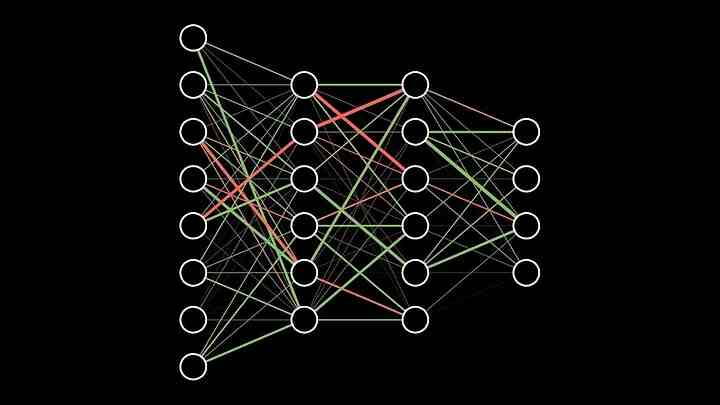
We typically think of Deep Learning as an end-to-end process;
a black box with an input and an output1.
For the purposes of this workshop using GitHub codespaces FTorch is built when sourcing the build_FTorch.sh script.
This downloads the FTorch source from GitHub, installs libtorch through PyTorch, and then uses CMake to build FTorch and link it to libtorch.
If you want to build locally you can inspect this script for more details and consult the comprehensive online documentation.
FTorch source code
The source code for FTorch is contained in the src/ directory. This contains:
ctorch.cpp - Bindings to the libtorch C++ API.
ctorch.h - C header file to bind to from Fortran.
ftorch.f90 - the umbrella module that uses submodules containing the Fortran routines we will be calling (ftorch_devices.F90, ftorch_types.f90, ftorch_tensor.f90, ftorch_model.f90, ftorch_optim.f90).
These are compiled, linked together, and installed using CMake.
Simplify build process for users.
Accomodate different machines and setups.
Configured in the CMakeLists.txt file.
FTorch_utils
FTorch includes a pip-installable Python library ftorch_utils that installs the handy pt2ts command-line utility for converting Python models to TorchScript.
It also installs PyTorch and other dependencies as required by the FTorch examples suite.
If installing in codespaces using build_FTorch.sh these will be installed into a Python virtual environment for you.
Time for the practical
Exercise 0 – Hello Fortran and PyTorch!
Question: What are people’s experience levels with and use cases of Fortran and PyTorch?
Navigate to exercises/exercise_00/ where you will see both Python and Fortran files.
Python
hello_pytorch.py defines a net SimpleNet that takes an input vector of length 5 and multiplies it by 2.
Note:
the nn.Module class
the forward() method
Running:
python hello_pytorch.py
should produce the output:
Input is tensor([0., 1., 2., 3., 4.]).Output is tensor([0., 2., 4., 6., 8.]).
Compilers and CMake
First we will check that we have a Fortran compiler and CMake installed:
Running:
gfortran --versioncmake --version
Should produce output similar to:
GNU Fortran (Homebrew GCC 14.1.0_1) 14.1.0Copyright (C) 2024 Free Software Foundation, Inc.This is free software; see the source for copying conditions.There is NO warranty; not even for MERCHANTABILITY orFITNESS FOR A PARTICULAR PURPOSE.cmake version 3.31.0CMake suite maintained and supported by Kitware (kitware.com/cmake).
and not:
bash: command not found: gfortranbash: command not found: cmake
Fortran
The file hello_fortran.f90 contains a program to take an input array and call a subroutine to multiply it by two before printing the result.
The subroutine is contained in a separate module math_mod.f90, however.
Fortran
Now we will compile the code using CMake.
First create a build directory and generate build scripts using CMake:
Now that we have FTorch installed on the system we can move to writing code that uses it, needing only to link to our installation at compile and runtime.
We will start of with a basic example showing how to couple code in Exercise 1:
Design and train a PyTorch model.
Save PyTorch model to TorchScript.
Write Fortran using FTorch to call saved model.
Compile and run code, linking to FTorch.
PyTorch
Examine exercises/exercise_01/simplenet.py.
This contains a contrived PyTorch model with a single nn.Linear layer that will multiply the input by two.
With our virtual environment active we can test this by running the code with1:
To use the net from Fortran we need to save our PyTorch net as TorchScript in a .pt file.
FTorch comes with a handy utility pt2ts to help with this, which is installed alongside the Python components of the library.
We run simplenet.py to produce a PyTorch model file (.pt file with the model architecture and weights), then use the pt2ts command to convert it to TorchScript ready for use from Fortran.
Saving to TorchScript
We already ran
python3 simplenet.py
Run
ls
to check that the pytorch_simplenet_input_tensor_cpu.pt file was created.
Then convert to TorchScript using the pt2ts command:
In exercise 1 we used a contrived model, SimpleNet, with a 1-D input.
In this exercise we take a step up using a real-world example: classifying images with a pre-trained ResNet-18 model from TorchVision.
We will reinforce what we learnt in exercise 1 whilst using multidimensional data and briefly exploting batched data as an extension. As part of this we will also discuss data layout differences between Python (row-major) and Fortran (column-major).
Exercise 2
Navigate to exercises/exercise_02/.
You will find:
generate_input_batch.py – preprocesses image(s) to a binary data file.
resnet_infer_python.py – Run resnet from Python.
resnet_infer_fortran.f90 – template with ! TODO comments.
resnet_infer_fortran_sol.f90 – complete solution.
data/ – example images and ImageNet labels.
Stage 1: Basic inference
Generate input:
python generate_input_batch.py
takes images in data/, and pre-processes them ready for input to the ResNet model.
Python (C) and Fortran store arrays in opposite memory order:
Python: row-major, last index varies fastest.
Fortran: column-major, first index varies fastest.
This is why we transpose the data in Python before saving when generating the batch input:
np_input = np_input.transpose().flatten()
transpose() reverses axes from [B, C, H, W] to [W, H, C, B].
This means that when read into memory by Fortran they will appear structured as we expect. FTorch then uses Torch’s strided memory access to account for differences in layout meaning the arrays can appear the same to the user in both Fortran and Python.
What we have considered so far is a simple contrived example designed to teach the basics.
However, in reality the codes we will be using are more complex, and full of terrors.
We will be calling the net repeatedly over the course of many iterations.
Reading in the net and weights from file is expensive.
Don’t do this at every step!
Exercise 3: Larger code considerations
In exercise 3 we will look at an example of how to ideally structure a slightly more complex code setup. For those familiar with climate models this may be nothing new. We make use of the traditional separation into subroutines for:
Initialisation
Updating
Finalisation
Exercise 3
Navigate to the exercises/exercise_03/ directory.
Here you will see two code directories, good/ and bad/.
Both perform the same operation:
Running the simplenet from example 1 10,000 times.
Increment the input vector at each step.
Accumulate the sum of the output vector.
Exercise 3
The exercise is the same for both folders:
Run the pt2ts command to save the net (as in exercise 1).
Inspect the code to see how it works:
Both have a main program in simplenet_fortran.f90.
Both have FTorch code extracted to a module fortran_ml_mod.f90.
bad is in a single routine.
good is split into init, iter, and finalise.
Modify the Makefile to link to FTorch and build the codes.
Time the codes and observe the difference.
Exercise 3 - solution
For a complete version of the example, see the Looping example.
Exercise 4: automatic differentiation
PyTorch has a powerful automatic differentiation engine called autograd that can be used to compute derivatives of expressions involving tensors.
We recently exposed this functionality in FTorch, allowing you to do this in Fortran, too. This is a key step facilitating online training in FTorch.
In this exercise, we walk through differentiating the mathematical expression \[Q = 3 (a^3 - b^2/3)\] using both PyTorch and FTorch.


 Who’s that Pokémon?